Tag Archives: sewing

Bespoke Kitty

For art and crafts this week, Ellie wanted to sew something with the machine. Really she wanted to sew a dress for herself, but I convinced her that was a big project and we should wait for summer when there was more time. We made this instead.
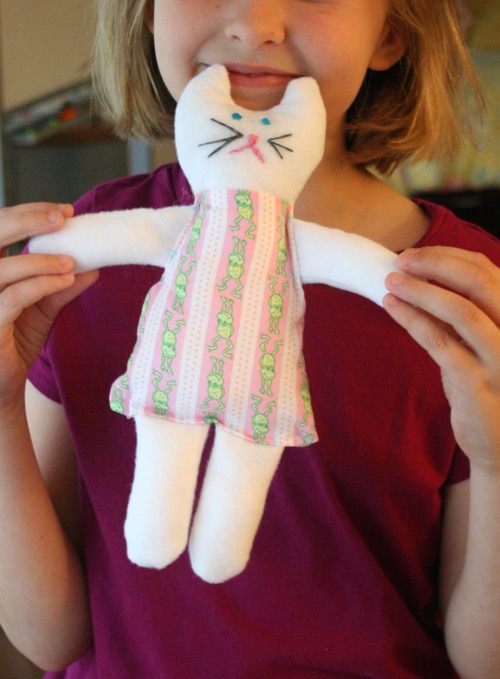
Mimi the Kitty.

Mimi the Kitty.

She embroidered the face and pinned everything up on her own. There was a fair amount of scaffolding for the sewing parts (I really made the pattern too small for her to sew independently I’ll know better next time) but she pressed the pedal and guided the fabric as much as possible. The cat parts are craft felt and Mimi’s body is fabric left over from some of Tiny Ellie’s homemade PJ pants.

We should make PJ pants!
There’s only one curved seam!
Ooh.

I stumbled on the cat doll idea looking for beginner sewing projects, and of course I can’t find it now. My web history doesn’t go back to last weekend apparently. Thank you, anonymous stranger!

Three Things

  • First, Ellie’s Halloween costume is finished! (except for the hook on the jacket – I’ll do it when Lady Bird gets out of my lap)
    I cheated and ordered the wings

    Not pictured: Crown and wand.

  • Second, I haven’t had a Butterfinger in three years but I don’t miss them anymore because oh my oh my oh these are SO GOOD. You’ll need a candy thermometer, and don’t tweet that you are making candy while the sugar is on the heat.


    Butter Finger Candy
    I love you, CLARYN.

    Ingredients
    1 c. creamy peanut butter (not the natural kind)
    1 tsp. vanilla extract
    ¼ tsp. salt
    1 c. sugar
    â…“ c. light corn syrup
    ½ c. water
    ¾ c. chocolate chips (Ghiredelli semi-sweet are dairy free)
    1 T. shortening

    Instructions
    Grease an 8-inch square pan.

    In a small saucepan, stir together peanut butter, vanilla, and salt. Warm all that over low heat until it’s melty and then keep it warm.

    In a medium saucepan, stir together sugar, corn syrup and water.

    Cook sugar goo over medium-high heat just until it reaches 290 degrees, under hard crack. Don’t tweet. Don’t get bored. Don’t look away it will surprise you!

    Quickly stir in peanut butter until well mixed.

    Dump in prepared pan, QUICK IT’S ALREADY COOLING!

    Let cool on a wire rack (or cold stove eye) for about 8 minutes. Don’t try to eat it yet (HOT).

    Melt the chocolate chips and shortening in the microwave. Heat for 30 seconds at a time, stirring in between until molten chocolate is achieved.

    Pour the chocolate over the top of the peanut butter candy part and spread it out to coat. Put it in the ‘fridge so it will set more quickly. Cut it into bars and eat every last crumb before you think about taking a picture. Wonder how soon is too soon to make more…

  • Third thing: I’m sure you noticed that New York City had a LOT of water in it yesterday. New Jersey isn’t much better and there is a lot of surrounding area with storm trouble. I’m sure you’ve already donated to the Red Cross and the Humane Society or other disaster relief organizations if you feel so inclined. But you know, there are a lot of fiber farms up that way who are going to need a little help getting trees off of their fences and patching roofs and the like. So, maybe take a minute to consider doing what knitters do best: find those farms and buy some yarn. Tell them no rush shipping, you can wait. But they’ll know you’re thinking about them.
  • What I Did

    Last Friday, Ellie’s little school had a 50s day. So I made this:

    kitty skirt

    A kitty skirt. That’s better than a poodle skirt because of the kitty.

    That skirt part was easy because of this tutorial. The hard part was that my sewing machine is at the beach with Mom. So I had to use this one:

    folded up

    Wait for it…

    I mean this one:

    tadah!

    Ta-Dah!

    That’s my Granny Nix’s Kenmore from 1968. It weighs at least one thousand pounds. It was only manufactured for two years. I have no manual. It took Google and me three hours to figure out how to oil the thing, thread the machine, wind the bobbin*, get the bobbin back where it goes and put a new needle in the right way**.

    It’s not like I brokered world peace, taught Congress some ethics or revolutionized health care in America, but I’m still pretty proud of myself. More skirt pictures on the Flickr.

    *Tip 1: This model has a plate on the end of the wheel that advances the needle. That plate comes loose to disengage the machine so you can wind the bobbin.
    **Tip 2: There is a groove along one side of a sewing machine needle. The grove should face the bobbin. You may have to thread the needle from left to right instead of front to back depending on where the bobbin is on your machine.